Grow bags offer flexibility, breathability, and improved root development compared to traditional containers. However, what you place underneath your grow bags is just as crucial as what goes inside them.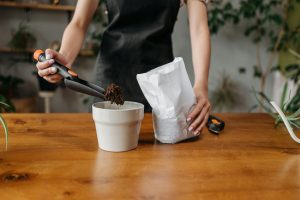
The base surface beneath your grow bag can impact water drainage, air circulation, and even pest resistance.
In this detailed guide, we reveal the 20 best things you can do or place under grow bags to optimize plant health, maintain cleanliness, and improve your overall gardening experience. Let’s get started with these effective ideas.
20 Best Things What To Do Under Grow Bags
1. Wooden Pallets – best for airflow
Wooden pallets elevate your grow bags, allowing air to circulate underneath. This improves drainage and keeps roots from sitting in water. They also protect your bags from ground pests.
The slatted design of pallets makes them ideal for preventing moisture buildup. They’re especially helpful in humid or rainy areas. You can easily find discarded pallets for free or low cost.
Just make sure the wood is untreated to avoid chemical leaching. Place pallets on even ground for maximum balance.
Pros:
- Promotes airflow
- Prevents rot
- Pest barrier
- Reusable
- Cost-effective
- Raises bags
- Good drainage
Cons:
- Can rot
- Needs leveling
- May attract termites
2. Concrete Blocks – best for stability
Concrete blocks offer strong, permanent support for grow bags. They lift the bags off the ground and prevent moisture absorption from below. They’re perfect for fixed gardening setups.
Their weight keeps grow bags stable even during strong winds. You can also stack blocks to raise the height as needed. They’re great for urban gardening on rooftops or patios.
While not as portable, they require zero maintenance. Just ensure they’re arranged safely and evenly.
Pros:
- Long-lasting
- Stable base
- Wind resistant
- Pest resistant
- No maintenance
- Reusable
- Easy to clean
Cons:
- Heavy
- Not portable
- May crack
3. Wire Mesh – best for rodent protection
Placing wire mesh under grow bags prevents burrowing animals from accessing roots. It creates a physical barrier without affecting drainage. Ideal for gardens prone to moles and gophers.
Choose galvanized mesh for durability. It can be easily cut to fit your garden space or grow bag size. Works great in both outdoor and greenhouse environments.
Over time, it may rust, but it still functions effectively. Avoid placing sharp edges near fabric grow bags.
Pros:
- Blocks rodents
- Improves airflow
- Easy to shape
- Rust-resistant
- Thin and light
- Inexpensive
- Durable
Cons:
- May rust
- Sharp edges
- Needs handling
4. Plastic Sheeting – best for moisture control
Plastic sheeting acts as a moisture barrier between the grow bag and the ground. It prevents damp soil from wicking into the bag. This is helpful in rainy regions or for use on wooden surfaces.
Use thick plastic to avoid tearing. Make small holes if you need minimal drainage. Works especially well indoors or in greenhouses.
Avoid extended sun exposure to prevent plastic degradation. Always weigh down the edges.
Pros:
- Moisture barrier
- Easy setup
- Protects surfaces
- Keeps area clean
- Affordable
- Prevents staining
- Lightweight
Cons:
- May tear
- Can overheat
- Non-biodegradable
5. Gravel Bed – best for drainage
A layer of gravel beneath your grow bag enhances water drainage. It ensures runoff doesn’t collect beneath the bag and encourages drying. Useful in areas with poor soil drainage.
Lay the gravel evenly to provide a stable, level base. You can combine it with landscaping fabric for better weed control. It adds weight, helping prevent shifting.
While long-lasting, gravel can be expensive and difficult to move once placed.
Pros:
- Excellent drainage
- Stabilizes bags
- Long-lasting
- Aesthetic base
- Weed control
- Prevents soggy ground
- Non-organic
Cons:
- Heavy
- Hard to move
- Costly
6. Bricks – best DIY option
Bricks are easy to repurpose and can elevate grow bags with style. They resist moisture and rot and offer good support. Perfect for patios, balconies, or greenhouses.
Arrange bricks in rows or grids under your bags. You can raise the bag slightly to improve drainage while keeping them neat. Bricks are long-lasting and durable.
They may become uneven if placed directly on soil. Always level the base area first.
Pros:
- Reusable
- Durable
- Adds height
- Stylish look
- Easy to find
- No decay
- Versatile use
Cons:
- Can tilt
- Adds weight
- Limited airflow
7. Wooden Boards – best for flat surfaces
Wooden boards create a smooth and flat surface for your grow bags. They offer a barrier between the bag and moist soil, reducing the chance of root rot. Ideal for uneven or muddy garden beds.
Treated properly, wooden boards can last several seasons. They also help distribute the weight of the grow bag more evenly. Great for temporary and semi-permanent setups.
Avoid using rotting or untreated wood for longevity. Ensure good drainage below the board.
Pros:
- Flat surface
- Prevents sinking
- Easy setup
- Reusable
- Weight distribution
- Customizable
- Garden-friendly
Cons:
- May rot
- Needs sealing
- Less airflow
8. Landscape Fabric – best for weed control
Landscape fabric under grow bags helps suppress weeds and allows water to drain. It forms a breathable barrier between your grow bag and the ground. Especially effective for garden plots and greenhouse floors.
The fabric also helps keep the area clean and mud-free. You can secure it with garden staples for long-term use. Choose UV-resistant types for extended outdoor exposure.
Avoid overlapping too much, which can restrict drainage. Replace when it starts degrading.
Pros:
- Weed barrier
- Allows drainage
- Breathable layer
- Clean surface
- Easy to install
- Custom size
- Low maintenance
Cons:
- Can fray
- May shift
- Degrades over time
9. Bamboo Mats – best eco-friendly base
Bamboo mats are biodegradable and offer a firm yet breathable base. They prevent direct soil contact and add a natural aesthetic. Great for organic and sustainable gardening.
These mats are lightweight and easy to position. They also protect delicate patio surfaces from moisture. Best used in covered areas or during dry seasons.
They may break down faster in wet environments. Replace as needed each growing season.
Pros:
- Biodegradable
- Lightweight
- Natural look
- Easy to handle
- Affordable
- Absorbs moisture
- Plant-safe
Cons:
- Not waterproof
- Short lifespan
- Attracts mold
10. Tile Slabs – best for patios
Ceramic or concrete tile slabs offer a clean and decorative base for grow bags. They protect your patio or balcony surface while improving drainage. Excellent for container gardens.
These tiles are easy to clean and add a modern touch. Their firm base ensures grow bags stay upright. Choose textured tiles to avoid slippage.
Avoid thin tiles that might crack under pressure. Always ensure even placement.
Pros:
- Decorative
- Easy to clean
- Moisture barrier
- Stable base
- Long-lasting
- Smooth surface
- Great for patios
Cons:
- Can crack
- Slippery
- Heavy
11. Rubber Mats – best for shock absorption
Rubber mats provide cushioning and insulation under grow bags. They prevent wear on delicate surfaces like wood decks. Useful for rooftop gardens and balconies.
These mats are waterproof and non-slip, offering a safe base. Choose UV-resistant types for outdoor use. Easy to clean and reposition.
Over time, they may degrade with UV exposure. Always clean between seasons.
Pros:
- Shock absorbent
- Protects floors
- Non-slip
- Waterproof
- Reusable
- Easy to cut
- Comfortable
Cons:
- UV sensitive
- Can smell
- Degrades slowly
12. Plastic Crates – best for elevation
Plastic crates raise grow bags for better airflow and drainage. Their grid structure prevents water pooling underneath. Perfect for humid climates.
They’re lightweight and easy to move around. Stackable crates also allow tiered gardening. Choose sturdy, food-safe plastic.
Avoid using brittle crates that might crack. Clean before reuse.
Pros:
- Good airflow
- Stackable
- Reusable
- Lightweight
- Great drainage
- Pest deterrent
- Portable
Cons:
- May crack
- Limited sizes
- Plastic waste
13. Foam Panels – best insulation
Foam panels insulate grow bags from cold or hot surfaces. They work well on concrete or rooftops. Ideal for delicate root systems.
Cut panels to fit any bag shape. Lightweight and easy to install. Also cushions against surface damage.
Avoid leaving exposed foam in direct sun. Anchor if used outdoors.
Pros:
- Temperature buffer
- Lightweight
- Easy to cut
- Cushions base
- Protects roots
- Inexpensive
- Insulating
Cons:
- Breaks easily
- Not eco-friendly
- Can blow away
14. Old Carpet Pieces – best reuse option
Old carpet sections act as a cushion and moisture barrier. They protect decks and patios while allowing limited water drainage. A cost-effective reuse solution.
Cut to desired size and layer under grow bags. Provides slight insulation and base stability. Works best in covered areas.
Avoid carpets with synthetic coatings. Replace if moldy or damaged.
Pros:
- Recycled use
- Cushions base
- Moisture blocker
- Adds insulation
- Readily available
- Cost-effective
- Soft surface
Cons:
- Can mold
- Not breathable
- May stain
15. Cork Sheets – best natural alternative
Cork sheets are natural, water-resistant, and biodegradable. They provide insulation and a flat surface. Great for organic gardening setups.
Cork doesn’t mold easily and offers a bit of cushion. Available in rolls or panels. Adds an aesthetic touch.
Can wear down in high-moisture areas. Replace every season.
Pros:
- Natural
- Insulating
- Lightweight
- Water-resistant
- Biodegradable
- Easy to cut
- Eco-friendly
Cons:
- Short lifespan
- Costly
- Can crumble
16. Paving Stones – best for permanent beds
Paving stones create a level and sturdy surface for grow bags. They prevent contact with wet soil and reduce weed growth. Perfect for permanent gardening zones.
Their heavy weight prevents movement. Available in many shapes and textures. Easy to hose down after use.
May require digging or leveling. Not suited for temporary setups.
Pros:
- Durable
- Weed control
- Decorative
- Easy to clean
- Doesn’t rot
- Stable
- Custom layout
Cons:
- Heavy
- Needs prep
- Expensive
17. Tree Bark Mulch – best for soft layering
Tree bark mulch creates a soft, organic layer under grow bags. Helps retain ground moisture while preventing mud. Best for backyard gardens.
The mulch also deters some pests and improves aesthetics. Easily sourced from garden centers. Decomposes over time into soil.
Needs regular replenishing. May shift with wind.
Pros:
- Organic
- Pest deterrent
- Soft base
- Improves look
- Moisture buffer
- Biodegradable
- Affordable
Cons:
- Decomposes
- Attracts bugs
- Needs replacing
18. Compact Sand Layer – best for leveling
A sand layer levels out uneven soil and supports your grow bag evenly. Useful in sloped gardens or rocky yards. Helps with minor drainage.
Tamp the sand flat before placing the bag. Works well when combined with pavers or boards. Easy to re-level if disturbed.
Sand can shift or compact over time. May need resetting.
Pros:
- Easy leveling
- Inexpensive
- Good drainage
- Readily available
- Reusable
- Simple setup
- Soft base
Cons:
- Can shift
- No structure
- Needs upkeep
19. Tarps – best for temporary setups
Tarps provide a temporary, waterproof layer for short-term planting. They prevent weeds, stains, and ground contact. Great for pop-up gardens.
Lay them flat and anchor with stones. Cut drainage holes if needed. Choose thick, UV-resistant materials.
Tarps can degrade with sun. Replace when worn.
Pros:
- Waterproof
- Fast setup
- Reusable
- Weed barrier
- Easy cleanup
- Budget-friendly
- Covers large area
Cons:
- Rips easily
- Not breathable
- Short lifespan
20. Straw Layer – best for insulation and mulch
Straw adds a soft, insulating layer that also works as mulch. Prevents erosion and ground chill. Ideal for raised garden beds.
Straw is organic and enhances soil as it decomposes. Keeps weeds down and moisture balanced. Easy to spread and remove.
May attract pests or mold. Replace periodically.
Pros:
- Insulating
- Organic
- Affordable
- Improves soil
- Mulches ground
- Pest deterrent
- Soft surface
Cons:
- Decomposes
- Attracts pests
- Blows away
What To Do Under Grow Bags FAQs
1. What is the best material to place under grow bags?
The best materials to place under grow bags include wooden pallets, plastic trays, gravel layers, or weed control fabric. These materials provide drainage, airflow, and protection from pests. Always choose a material suited to your specific climate and gardening setup.
2. Can I place grow bags directly on soil?
Yes, you can place grow bags directly on soil, but it’s highly recommended to use a barrier like landscape fabric or cardboard underneath. This helps prevent weed invasion and keeps the bottom of the grow bag from becoming soggy. Proper separation also improves root health and bag longevity.
3. Do I need to elevate grow bags off the ground?
While not absolutely necessary, elevating grow bags can significantly improve drainage and air circulation. You can use bricks, crates, or stands to lift them slightly. Elevation also helps reduce the risk of root rot and pest infestation.
4. Will placing a tray under a grow bag stop water from draining?
If the tray has no holes, it may collect excess water and cause root rot. Instead, choose trays with drainage slits or mesh bases to allow proper runoff. Monitoring moisture levels is key to keeping your plants healthy.
5. How do I prevent weeds from growing under grow bags?
Use weed barriers, mulch layers, or plastic sheeting to block sunlight and suppress weed growth. These materials create a barrier between the bag and the ground. Regular maintenance and inspections will also help keep weeds under control.
6. Is it okay to use grow bags on a balcony or concrete surface?
Yes, grow bags work great on balconies, patios, or concrete if you place something underneath. Use items like rubber mats, trays, or decking tiles to catch drainage and protect the surface. Just make sure water can still flow freely to avoid buildup.
7. How often should I check the material under grow bags?
You should inspect what’s under your grow bags every 2 to 4 weeks. Check for moisture buildup, mold, or pest activity. Rotating or repositioning your grow bags occasionally also helps maintain a healthy growing environment.
Conclusion
When it comes to optimizing the area beneath your grow bags, choosing the right base material is crucial for plant health, longevity of your bags, and garden cleanliness. After comparing all 20 solutions, the best overall option is wooden pallets, thanks to their superior drainage, airflow, and pest protection. The runner-up choice is plastic crates, offering excellent elevation and reusable durability for indoor or outdoor setups.
Each of the 20 methods we’ve explored brings unique advantages to different gardening situations—whether you’re growing on a balcony, backyard, or commercial plot. Selecting the right underlay reduces moisture problems, improves plant yield, and creates a tidier growing space.
If you’re ready to take your container gardening to the next level, implement one of these proven methods today. Don’t forget to monitor, maintain, and rotate your setup for maximum results. Happy growing—your plants deserve the best from the ground up!
Recent Posts
Choosing the Best Fertilizer For Salvias is essential for achieving vibrant blooms, lush foliage, and strong root systems. Proper nutrient management ensures salvias receive the right balance of...
Choosing the best fertilizer for ginger plant is essential for achieving strong rhizome development, vigorous foliage, and high yields. Proper nutrient management ensures ginger plants receive the...