Setting up the Blink Mini camera can feel challenging for first-time users who are new to smart home security. The device, however, is designed to provide a simple installation experience with clear visual guidance and intuitive controls.
The Blink Mini offers reliable indoor surveillance through crisp video, responsive motion alerts, and strong app-based management features. Its compact design and easy placement options make it suitable for apartments, offices, and homes of any size.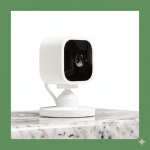
Understanding each stage of the setup process ensures your camera functions smoothly and captures accurate footage at all times. A correct installation also strengthens your Wi-Fi connection performance and improves long-term device reliability.
In this guide, you will learn how to install, pair, test, and optimize your Blink Mini camera using simple, step-by-step instructions built for complete beginners. You will also discover helpful tips that improve performance, stability, and overall user experience.
How Do I Set Up My Blink Mini Camera? A Step-By-Step Setup Guide
STEP 1: Unboxing Your Blink Mini Camera
Unboxing the Blink Mini camera is the first step toward a smooth installation experience. Inside the box, you will find the camera, USB power cable, power adapter, mounting stand, and a quick-start guide. Ensure all items are present and undamaged before you begin the setup.
Properly inspecting the components helps you avoid installation issues later. The camera stand, screws, and adapter must be in perfect condition to ensure a successful mounting and power connection. A complete unboxing check saves time and minimizes interruptions during the installation process.
Make sure you place all components on a clean surface for easy access. This preparation helps you follow the upcoming steps with confidence. Keeping everything organized ensures the setup continues without delays or confusion.
STEP 2: Connecting the Blink Mini to Power
Connecting your Blink Mini to power is essential for activating the device. Use the included USB cable and plug it firmly into the back of the camera. After connecting the USB end to the adapter, plug the adapter into a working power outlet.
You should see a flashing blue light and a steady green light on the front of the camera. These lights indicate that the device has successfully powered on and is ready for pairing. If no lights are visible, try using a different outlet or inspect the cable connection.
Proper power connection ensures stable operation and successful Wi-Fi setup. Avoid using third-party power adapters, as they may cause voltage issues. Using the original adapter maintains safety and performance.
STEP 3: Downloading the Blink Home Monitor App
The Blink Home Monitor App is required to control and manage your Blink Mini. You can download it from the Google Play Store or Apple App Store, depending on your smartphone. This app allows you to add devices, view live footage, and receive motion alerts.
After downloading, open the app and allow necessary permissions such as notifications and camera access. These permissions help the app perform essential functions like scanning QR codes and sending alerts. Without granting access, parts of the setup may not function properly.
Make sure your phone is connected to a stable internet connection while downloading the app. This ensures a smooth installation and avoids app setup delays. Using the updated version of the app guarantees compatibility and better performance.
STEP 4: Creating or Logging Into Your Blink Account
If you are new to Blink, you must create an account within the app. Enter your email, create a secure password, and verify your identity through the confirmation code sent to your inbox. This secure login ensures your video data remains protected.
Returning users can simply log in using their existing credentials. Once logged in, the app synchronizes your previous devices and settings automatically. This is useful if you already have other Blink cameras or modules connected.
Your account serves as the central hub for all Blink devices. Without an account, you cannot access live view, motion alerts, or cloud storage. Logging in ensures your Blink Mini integrates seamlessly with your smart home system.
STEP 5: Adding Your Blink Mini Camera in the App
Once inside the app, tap the plus sign at the top to add a new device. Select “Blink Mini Camera” from the available device list. The app will guide you through the required steps for detection and configuration.
You will be asked to scan the QR code located on the back of the camera. Hold your phone steady over the code until the app detects it. Scanning the code ensures the app identifies your exact device and pairs correctly.
After scanning, the app begins preparing the camera for Wi-Fi setup. This process ensures both the phone and camera communicate in real time. Following the instructions carefully ensures the pairing works smoothly.
STEP 6: Connecting the Camera to Your Wi-Fi Network
Your Blink Mini requires a stable Wi-Fi connection to stream video and send alerts. Choose your network from the list displayed in the app. Enter your Wi-Fi password correctly to avoid connection errors.
Ensure you connect to a 2.4GHz Wi-Fi band, as Blink Mini does not support 5GHz networks. This frequency provides better range and stability for indoor surveillance. Connecting to the correct band ensures consistent video streaming.
Once the connection is accepted, your camera will attempt to sync with the network. This process may take a few seconds. When successful, the app will display a success message on the screen.
STEP 7: Confirming Device Sync and Activation
After Wi-Fi setup, the camera must sync with your Blink account. This ensures that the device is recognized and registered to your system. The sync process establishes communication between the server and your camera.
A solid blue light on the camera indicates successful activation. You should also see the device listed inside the app. This confirms that your Blink Mini is now fully connected.
If the sync fails, restart the camera and try again. Correcting minor network issues often resolves activation problems. Ensuring stable Wi-Fi boosts success rates during activation.
STEP 8: Adjusting Camera Settings and Preferences
After activation, you can personalize your camera settings. The Blink app allows you to adjust motion detection, recording length, and sensitivity levels. These customizations ensure your camera captures only what matters.
You can also adjust video quality to suit network speed. Higher resolution offers clearer footage but may require stronger Wi-Fi. Lower settings help reduce buffering and improve stability.
Explore audio, night vision, and privacy zone options. These features enhance your surveillance experience based on your needs. Personalizing settings ensures the Blink Mini performs exactly as expected.
STEP 9: Positioning the Blink Mini for Best Results
Choosing the right location helps the camera capture clear and relevant footage. Place it on a stable surface or mount it using the included stand. A height of four to six feet gives the best viewing angle.
Make sure the camera faces the area you want to monitor. Avoid pointing it toward bright windows or direct light sources. Proper positioning improves motion detection accuracy.
Always check the live view before finalizing placement. This ensures the area is fully visible and free from obstruction. Testing the angle results in better surveillance performance.
STEP 10: Mounting the Blink Mini for Permanent Use
Mounting the camera provides a secure and permanent monitoring setup. Use the mounting stand included in the box. Attach the stand using the screws provided, ensuring it is firmly secured.
Once mounted, snap the camera onto the stand and adjust the angle. The ball joint design allows flexible movement for perfect positioning. A stable mount prevents vibration and accidental camera shifts.
Consider mounting near power outlets to reduce cable clutter. Keeping cables neat improves overall organization and aesthetic. Proper mounting ensures long-term surveillance reliability.
STEP 11: Testing Motion Detection and Alerts
Testing motion detection helps confirm your camera is working correctly. Walk across the monitored area to trigger the sensor. The app should send a notification within seconds.
If alerts do not appear, review sensitivity settings. Increasing the sensitivity improves detection for subtle movements. Lowering it helps reduce unnecessary notifications.
Adjust the motion zones for accuracy. This reduces false alerts caused by background activity. Testing ensures the system matches your preferences.
STEP 12: Setting Up Two-Way Audio
Two-way audio allows communication between you and the monitored area. Test the microphone by speaking into the app’s live view feature. You should hear clear audio through the camera.
Test speaker quality by listening to sounds from the camera side. Ensure the environment is quiet for accurate audio testing. Clear audio is essential for monitoring pets or communicating with family members.
If audio quality is poor, adjust network settings. Stable Wi-Fi significantly improves sound clarity. Optimizing audio settings enhances user experience.
STEP 13: Enabling Night Vision Mode
Night vision enhances visibility in dark or low-light rooms. The camera automatically switches to infrared mode when needed. You can also enable or adjust settings manually in the app.
Test night vision by turning off the lights in the monitored area. Check live view to confirm the image remains clear. Proper night vision ensures round-the-clock monitoring.
If the image appears blurry, clean the lens with a microfiber cloth. Dirt or smudges can affect infrared clarity. Maintaining lens cleanliness improves night-time performance.
STEP 14: Saving and Managing Recorded Clips
Your Blink Mini records clips when motion is detected. Access these clips in the app under the “Clips” section. Review or delete recordings based on your preferences.
You can download important videos to your phone. This helps save critical evidence or personal moments. Use the cloud storage option for long-term security.
Managing clips regularly frees storage space. Deleting unnecessary files keeps your app organized. Good storage management ensures better system performance.
STEP 15: Troubleshooting Common Setup Issues
Sometimes, setup problems occur due to network instability. Restarting your router and reconnecting the camera often solves the issue. Ensure your Wi-Fi password is correct.
If the camera fails to sync, reset it using the button on the back. This clears temporary glitches. Try pairing again after resetting.
Contact Blink support if issues persist. Their team provides specialized solutions. Seeking support ensures your device functions smoothly.
How Do I Set Up My Blink Mini Camera FAQs
1. Does the Blink Mini require a subscription?
Blink Mini works without a subscription for live view and basic features. A subscription is only required if you want cloud video storage. Local storage options are available using a Sync Module 2.
2. Can the Blink Mini connect to 5GHz Wi-Fi?
No, the camera only supports 2.4GHz Wi-Fi networks. This frequency offers better range and stability for indoor monitoring. Using 2.4GHz ensures reliable performance.
3. Can I use the Blink Mini outdoors?
The Blink Mini is designed for indoor use only. Exposure to moisture or extreme temperatures can damage the device. Consider Blink Outdoor models for exterior monitoring.
4. How do I reset my Blink Mini camera?
Press and hold the reset button located on the bottom of the camera. Hold it for 10 seconds until the light begins flashing. Resetting restores the device to factory settings.
5. Why is my Blink Mini not connecting to Wi-Fi?
Your router may be using a 5GHz band or experiencing signal issues. Ensure you select the 2.4GHz band during setup. Restarting your router can also help.
6. Why is my Blink Mini showing a black screen at night?
This is often caused by poor infrared lighting. Check if night vision is enabled in the settings. Clean the lens to improve clarity.
7. Can I share my Blink camera with family members?
Yes, Blink allows multiple users to access the same system. Simply log in using the same account on multiple devices. This is helpful for household monitoring.
CONCLUSION
Setting up the Blink Mini camera is simple when each step is followed carefully and in the correct order. The device provides dependable indoor surveillance that is easy to manage and control through the Blink Home Monitor App.
With proper configuration, the camera delivers smooth video streaming, accurate motion detection, and clear night vision capabilities. This guide has walked you through everything from unboxing and Wi-Fi setup to testing advanced features and troubleshooting common issues.
The Blink Mini is a reliable and user-friendly device suitable for beginners and experienced users alike. In this article, you have learned how to power, mount, adjust, and optimize your Blink Mini for maximum security.
If you are ready to enhance your indoor monitoring experience, start using your Blink Mini confidently and enjoy reliable home protection every day.
Recent Posts
The best fertilizer for Aechmea fasciata is essential for promoting vibrant bract coloration, strong root systems, and steady vegetative growth throughout the active season. Selecting fertilizers...
The best fertilizer for landscaping is essential for maintaining lush lawns, vibrant plants, and healthy soil structure across diverse outdoor environments. Selecting fertilizers with NPK ratios such...